

Key Takeaways
A successful Haval H9 suspension upgrade starts with a clear use case, accurate fitment information, and realistic expectations about lift height. The best result is not necessarily the tallest setup, but the one that keeps the vehicle predictable, comfortable, and serviceable.
- Define whether the vehicle prioritizes daily comfort, touring loads, or difficult trails.
- Match springs and dampers to the vehicle’s actual weight and intended use.
- Confirm model year, trim, drivetrain, wheel, and tire compatibility before ordering.
- Check alignment, brake-line routing, and suspension geometry after installation.
- Test the vehicle gradually and maintain every upgraded component on schedule.
Understanding the Haval H9 suspension system
The Haval H9 suspension has to do several jobs at once: support a heavy SUV, absorb ordinary road impacts, maintain tire contact, and cope with uneven ground. Altering one part of that system affects the others, so a lift should be treated as a complete setup rather than a spacer or spring purchase in isolation. Start by recording the vehicle’s current ride height, tire size, accessories, and typical payload.
How the factory suspension is designed
The factory arrangement is designed around a compromise between road manners, passenger comfort, load support, and available wheel travel. Springs carry the vehicle’s weight while dampers control how quickly the suspension compresses and extends. Bushings, control arms, sway bars, and alignment settings then influence how that movement reaches the cabin and the tires.
That compromise is sensible for a vehicle used in mixed conditions. A stock H9 may feel settled on pavement while still offering useful clearance on gravel and mild tracks. Once a bull bar, winch, roof rack, drawers, or touring gear is added, the original balance can change even if the vehicle has not been driven aggressively.
Common ride and handling limitations
Owners usually notice limitations when the vehicle’s use changes, not because the factory system is automatically inadequate. Extra front weight can reduce available ride height, while a heavily loaded rear can make the vehicle sit low and use more of its travel. Repeated corrugations may also expose damping limitations that are not apparent during normal commuting.
A suspension upgrade should address the observed problem. More lift will not automatically improve damping, and firmer springs cannot compensate for a poorly matched shock absorber. The useful question is whether the vehicle needs more clearance, more load support, better control over repeated impacts, or a combination of those needs.
Signs your Haval H9 needs an upgrade
Before choosing parts, inspect the vehicle and separate normal wear from a genuine change in requirements. Uneven ride height, leaking dampers, persistent bouncing, bottoming over familiar roads, and steering changes after loading all deserve attention. A professional inspection is sensible if a clunk, pull, or unusual tire wear has appeared.
Useful observations include:
- Measure all four wheel-center-to-guard distances on level ground.
- Record the normal passenger, cargo, and accessory load.
- Check tires for cupping, feathering, or uneven shoulder wear.
- Note whether the problem occurs during compression, rebound, cornering, or braking.
These details make parts selection more precise. They also help distinguish a tired component from a design choice that simply no longer suits the vehicle.
Differences between model years and trims
Model year and trim should be treated as fitment information, not cosmetic details. Suspension dimensions, spring rates, electronic equipment, driveline arrangements, and factory ride heights can vary, and a part advertised for one H9 may not suit another without confirmation. The VIN, build date, engine, drivetrain, and existing modifications are useful checks before purchase.
Do not assume that a kit covering a broad year range has identical installation requirements at every end of that range. Compare the supplier’s application notes with the vehicle in front of you, and confirm whether the quoted lift is measured at the spring, the wheel arch, or the chassis.
Choosing the right Haval H9 suspension upgrade
Choosing a Haval H9 suspension upgrade is mainly an exercise in matching hardware to use. A vehicle that carries touring equipment every weekend needs a different spring strategy from one that spends most of its time unladen on city roads. Establish the desired ride height and loaded height first, then select dampers that can control the chosen springs.
Lift height and ground clearance goals
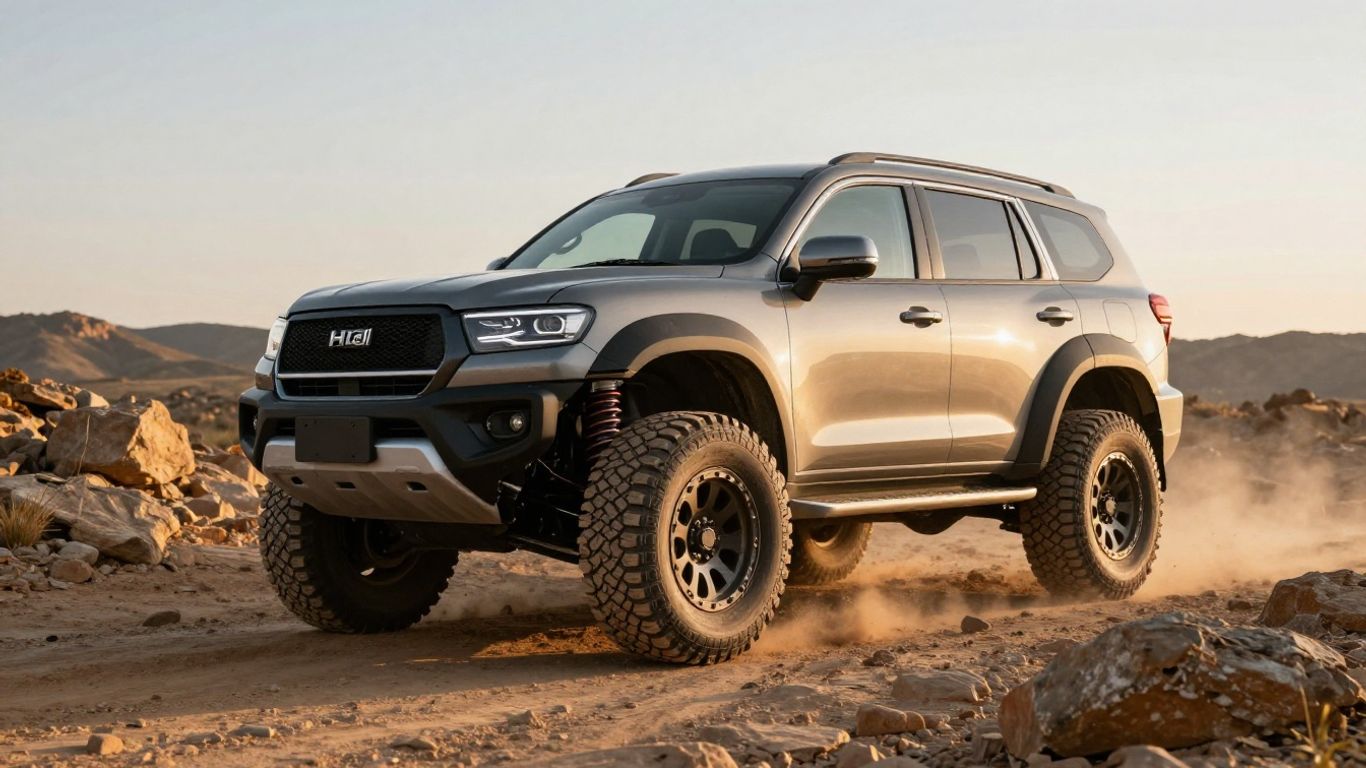
A modest lift can create useful room beneath the chassis and improve approach, ramp-over, and departure angles, but it also changes suspension geometry. Measure the current clearance at the differential, underbody protection, and vulnerable exhaust or tank areas rather than relying only on a claimed lift figure. Tire diameter may add clearance at the axle, while also changing gearing, steering feel, and body clearance.
A two-inch lift is a common reference point in the market, but the right amount depends on tire choice, payload, and the terrain being driven. The linked STR nitrogen shock lift kit is described as a 2.0–2.5-inch lift option with adjustable compression and rebound configurations; those specifications are a starting point for comparison, not a reason to choose that height automatically.
Comfort, load capacity, and off-road priorities
Spring rate determines more than static height. A spring that is too soft may sag under accessories and cargo, while one that is too firm can make an unloaded SUV harsh and less willing to follow small bumps. Damper valving must suit the spring, because control that feels reassuring when loaded may feel busy or stiff when the vehicle is empty.
Write down the vehicle’s usual and maximum touring loads. Include recovery equipment, water, fuel, passengers, roof cargo, and any permanent accessories. If heavy rear loads are a regular part of the plan, the Nitro Gas C Lift Kit is one documented example that uses a rear spring setup intended for heavy loads and vehicle-specific shock tuning.
Coil springs, shocks, and complete lift kits
Coil springs, shocks, spacers, bushes, and alignment hardware can be purchased separately or as a matched kit. Individual parts offer flexibility, but they require more careful checking of free length, compressed length, spring rate, travel, and mounting details. A complete kit can simplify compatibility when its application is clearly documented.
Do not judge a kit by lift height alone. Check what is included, whether the front assembly requires a compressor, whether replacement bushes or brackets are supplied, and whether the manufacturer specifies a particular load range. The cheapest route can become expensive if the final setup needs several corrective parts.
Nitrogen gas shocks versus standard dampers
Nitrogen gas charging is used in some dampers to help maintain consistent operation and reduce the tendency toward fade during repeated work. It does not, by itself, determine ride quality or make a shock absorber suitable for every spring. Bore size, valving, travel, mounting points, seals, and adjustment range still matter.
The Nitrogen Gas Suspension Lift Kit is documented as a twin-tube, nitrogen-gas-charged kit with eight-level damping adjustment and a two-inch lift. Those are specific product characteristics; when comparing any damper, check its actual specifications rather than treating “nitrogen” as a complete performance description.
Selecting compatible suspension components
Compatibility is where many suspension projects succeed or fail. Every part must work within the available compression and droop travel, clear surrounding components, and suit the vehicle’s actual mass. A visually similar part can still have the wrong bush, eyelet, rod length, spring seat, or mounting angle.
Front and rear spring options
Front and rear springs should be selected separately when the axle loads and accessories differ. Front coils need to account for permanent equipment such as a bull bar or winch, while rear coils must support passengers and cargo without creating an excessively stiff unloaded ride. Progressive and linear spring designs each have a place, but their behavior should be understood before installation.
Ask for the spring’s intended load range and installed height, not just a lift label. If the vehicle sits unevenly side to side, check the load distribution and existing component condition before compensating with different springs. A spring cannot fix a bent mount or worn bushing.
Shock absorber and strut specifications
Compare the damper’s extended and compressed lengths with the suspension’s available travel. A shock that tops out before the spring reaches its natural droop can cause noise and stress, while a shock that bottoms internally can restrict compression. Mounting hardware, piston-rod clearance, and dust protection are equally practical concerns.
Adjustment can be useful, but only if it is accessible and understood. Record the original setting, change one setting at a time, and test the same road or trail section after each change. A damper with many adjustments is not automatically better than a simpler unit with suitable valving.
Control arms, sway bars, and bushings
Raising the suspension changes the working angles of control arms, sway-bar links, and rubber bushings. Some vehicles tolerate a small change without additional hardware, while larger lifts may need geometry correction. The correct response depends on measured alignment and travel, not on lift height alone.
Inspect bushings for tearing, separation, or permanent distortion. Tighten pivot fasteners at the ride-height position where the design requires it; tightening with the suspension hanging can preload the bushing and shorten its life. Sway-bar links should move freely without binding at full steering lock and full suspension travel.
Wheel and tire fitment considerations
Larger tires can improve clearance beneath the axle, but they also introduce interference risks at the mudguard, inner liner, control arm, and chassis. Offset affects scrub radius and steering effort, while tire width affects clearance during articulation. Test fitment at both steering lock and suspension extremes instead of checking only when parked at normal height.
A suspension lift does not eliminate the need to verify load rating, wheel torque, speedometer effects, and spare-tire clearance. Tire pressure should be set for the actual load and terrain, with changes made gradually and checked for temperature and wear.
Planning a lift kit installation
Installation planning is part of the upgrade, not an afterthought. The vehicle should be inspected before it is dismantled, and the parts should be laid out against the supplied instructions. Photographing hose routing, washer order, and fastener locations can save time when the work is spread over more than one session.
Tools, workshop requirements, and preparation
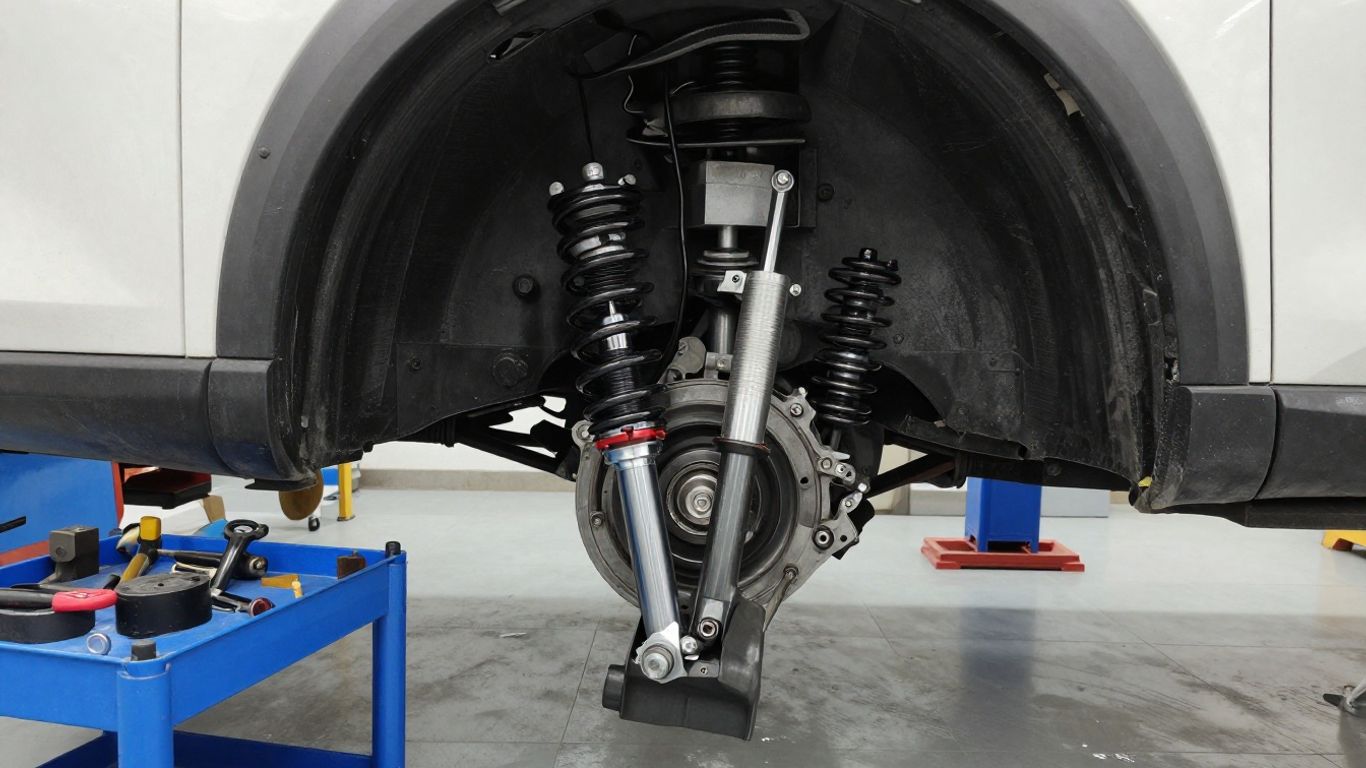
A safe installation needs a level work area, correctly rated stands, a reliable jack, torque tools, and equipment appropriate to the suspension design. Spring compressors can be hazardous when used incorrectly, particularly on front assemblies under substantial stored energy. Clean the mounting areas and check that replacement hardware, bushes, spacers, and brake-line brackets are present before starting.
Keep the vehicle supported by its proper structural points and never rely on a jack alone. Mark the original ride height and photograph the pre-installation stance. That record gives you a useful comparison after the springs settle.
Professional installation versus DIY fitting
DIY fitting can be practical for an experienced mechanic with suitable tools and a clear procedure. It becomes less attractive when the job involves compressed springs, seized fasteners, unfamiliar geometry, or no way to complete a post-installation alignment. A workshop can also identify related wear while the suspension is exposed.
The decision should be based on risk and equipment, not pride. If the job is outsourced, give the installer the vehicle’s intended load and ask for a written record of torque checks, alignment values, and any clearance issues found.
Alignment changes after installation
A lift can alter camber, caster, toe, and steering-wheel position. Even when the vehicle feels acceptable, incorrect alignment can accelerate tire wear and reduce confidence during braking or lane changes. Have the alignment measured after installation and again after the springs have settled if the installer recommends it.
The before-and-after printout matters more than a simple statement that the vehicle was aligned. Review the readings against the manufacturer’s allowable range and ask about any setting that cannot be brought into specification without additional correction parts.
Protecting brake lines and other components
As the suspension extends, brake hoses, ABS wires, breather lines, and shock bodies may experience a new range of movement. With the wheels removed, turn the steering from lock to lock and cycle the suspension as far as safely possible. Nothing should pull tight, rub, or become trapped between moving parts.
A short installation checklist helps prevent omissions:
- Confirm brake and ABS line slack at full steering lock.
- Check shock clearance around springs, tires, and control arms.
- Inspect breather hoses and underbody protection for tension or contact.
- Recheck wheel torque and suspension fasteners after the first drive.
The checklist is most useful when paired with a physical inspection rather than treated as paperwork. Small routing problems can become serious after repeated articulation or vibration.
Balancing lift height with driving safety
A lift changes the way the vehicle moves, even if the parts are high quality. The center of gravity rises, suspension angles change, and the relationship between spring rate and damping may feel different on pavement. Good setup work keeps those changes predictable rather than chasing maximum height.
How suspension lifts affect geometry
Raising the body changes control-arm angles and can affect caster, camber, toe, and bump-steer behavior. It may also reduce the amount of droop available if the damper or spring is not correctly matched. These effects are why alignment and clearance checks belong in the original plan.
Geometry should be assessed at normal ride height and through the usable range of movement. If steering effort, self-centering, or tire wear changes after the lift, investigate those symptoms instead of masking them with stiffer damping.
Managing body roll and ride comfort
Body roll is influenced by spring rate, sway-bar behavior, damping, tire sidewalls, and load distribution. A very firm spring may reduce visible roll while transmitting more harshness over broken surfaces. Conversely, a soft setup can feel comfortable until the vehicle is loaded or driven through a fast direction change.
Aim for controlled movement rather than a motionless body. The best setting lets the tires remain in contact with the surface and gives the driver enough warning before the vehicle reaches its limits. Comfort is part of safety because a tiring, unsettled vehicle is harder to manage over a long trip.
Avoiding excessive lift and premature wear
Extra height increases stress on joints, bushes, CV components, and steering parts when the angles become more severe. It can also reduce useful travel if the springs or dampers are chosen only for static lift. Premature wear often appears first as looseness, noise, uneven tire wear, or a change in steering response.
Choose the smallest lift that meets the clearance and load goal. Measured clearance matters more than claimed height when deciding whether another increment is worthwhile. Recheck the vehicle after accessories and tires are fitted, because those changes can alter the original calculation.
Maintaining stability on highways and trails
Highway testing should come before difficult off-road driving. Begin with gentle braking, lane changes, and bends on a familiar road, then listen for movement or contact. On trails, progress from smooth gravel to deeper ruts and articulation only after the vehicle has behaved consistently at lower speeds.
Reduce speed for unfamiliar terrain and keep loads secured. Suspension changes cannot compensate for poor tire condition, excessive cargo, or driving beyond visibility and surface conditions. Stability is a system outcome, not a single component feature.
Testing and tuning the upgraded suspension
Testing turns a collection of parts into a usable setup. Make one change at a time and keep notes on road surface, payload, tire pressure, damper setting, and weather. This is slower than adjusting everything at once, but it makes cause and effect much easier to recognize.
Checking clearance at full compression and droop
Inspect the vehicle with the steering straight and at both steering locks. Look for contact between tires, liners, springs, control arms, brake hoses, and bodywork. Then check compression and droop as far as the workshop setup safely allows, remembering that real articulation can move one wheel through a different path from the other.
Do not rely on a static driveway check alone. Mud, stones, and flexing plastic liners can create contact that is absent when the vehicle is clean and unloaded. Any witness marks should be investigated before the next serious trip.
Evaluating ride quality on different surfaces
Use several familiar surfaces: smooth asphalt, patched pavement, corrugations, gravel, and a controlled uneven section. Note whether the vehicle floats after a bump, skips across small impacts, dives under braking, or feels loose during a direction change. Test both unladen and with the usual touring load if possible.
A change that feels better on one surface may be worse on another. The aim is a stable compromise that preserves tire contact and driver control, not a perfect sensation on a single road.
Adjusting shock settings and spring rates
If the shocks are adjustable, begin at the supplier’s baseline and alter only one axle or one setting at a time. A small change followed by a repeat drive is more informative than several large changes. Spring rates should not be used as a substitute for damper adjustment, and damping should not be used to hide an unsuitable spring.
Record each setting and the vehicle load. If the vehicle remains harsh at soft settings or continues to bounce at firm settings, the issue may be component matching, insufficient travel, or a mechanical fault rather than an adjustment problem.
Identifying noise, sagging, or uneven handling
New knocks, squeaks, sagging, or a persistent pull warrant an inspection. Check that fasteners are torqued, springs are seated, bushes are not twisted, and brake or ABS wiring has not shifted. Uneven height can also come from an asymmetric load, a damaged spring, or a worn original component on one side.
Stop testing if steering control changes suddenly or a component shows damage. Suspension tuning is iterative, but it should never involve accepting a symptom that could indicate a safety issue.
Maintaining an upgraded Haval H9 suspension
An upgraded suspension needs a more deliberate maintenance habit because off-road use introduces dust, water, impacts, and repeated articulation. Maintenance is not only about preventing failure; it also preserves the ride and handling that justified the upgrade. Keep installation records, alignment sheets, and replacement dates together with the vehicle’s service information.
Inspection intervals for lifted vehicles
Inspect the suspension after the first few hundred miles or the first substantial off-road trip, then follow a regular interval based on use. A touring vehicle may need checks before and after long trips, while a lightly used daily driver can follow a longer routine. Any new vibration, pull, noise, or tire wear should shorten the interval.
Look at ride height, leaks, fasteners, spring seating, hose routing, and tire clearance. Comparing photographs and measurements over time can reveal gradual sagging that is difficult to notice from the driver’s seat.
Cleaning and protecting off-road components
Rinse mud and salt from springs, shock bodies, mounts, and underbody hardware with clean water, taking care around electrical connectors and seals. Avoid directing high-pressure water at seals from close range. Once clean, inspect for stone damage, corrosion, flaking coatings, or trapped debris.
Cleaning also makes a fault easier to see. A small oil film on a damper, a fresh rub mark, or a crack in a protective boot should be recorded and assessed rather than covered with more dirt.
Monitoring bushings, joints, and fasteners
Bushings and joints should be checked for movement, cracking, and contamination. Fasteners can loosen after repeated impacts, especially when a new setup has been installed recently or the vehicle is used on corrugated roads. Torque checks should follow the component manufacturer’s instructions and use the correct vehicle support position.
Do not replace every flexible component with a harder material without considering noise and compliance. A bushing’s ability to allow controlled movement is part of the suspension design, and removing that compliance can move stress elsewhere.
When to replace shocks and springs
Replace a shock when it leaks, loses control, is damaged, or no longer performs consistently after proper checks. Replace springs when they are cracked, permanently sagged, corroded through, or no longer support the documented load. Replacing only one spring on an axle is generally inappropriate unless the supplier specifically directs it.
At replacement time, reassess the vehicle’s current weight and tire setup. Accessories may have changed since the original installation, and a spring or damper that once suited the H9 may no longer match its real use.
Conclusion
A well-planned Haval H9 suspension upgrade is a measured balance of clearance, load support, damping, geometry, and maintenance. Set a practical goal, confirm every component against the exact vehicle, use qualified installation and alignment support where needed, and tune the result through careful testing rather than guesswork.
Frequently Asked Questions
How much lift is suitable for an SUV used off-road?
The suitable amount depends on tire size, terrain, payload, suspension travel, and the amount of geometry change the vehicle can safely accommodate. Use the smallest lift that meets the practical clearance goal.
Do larger tires require a suspension lift?
Not always. Larger tires may fit with minor changes or no lift, but clearance must be checked at steering lock and through compression and droop. Wheel offset and tire width are just as relevant as diameter.
Are firmer springs always better for carrying loads?
No. Firmer springs can support additional weight, but they may reduce comfort and traction when the vehicle is lightly loaded. The spring should match the vehicle’s usual and maximum load rather than the maximum possible load alone.
What should be checked after installing a lift kit?
Check fastener torque, spring seating, brake and ABS line routing, tire clearance, ride height, and wheel alignment. A short, cautious road test should be followed by another inspection.
Can adjustable shocks fix an unsuitable spring?
Adjustment can refine a well-matched setup, but it cannot fully correct an unsuitable spring rate, incorrect travel, or poor geometry. Component compatibility should be resolved before tuning.
How often should lifted suspension components be inspected?
Inspect them after installation and after demanding off-road use, then establish a routine based on mileage, terrain, load, and climate. Investigate any new noise, leak, sag, pull, or uneven tire wear promptly.
Is professional installation necessary for every lift kit?
Not every installation requires a workshop, but spring compressors, seized fasteners, alignment equipment, and unfamiliar geometry can make professional fitting the safer choice. The installer should document torque checks and alignment results.