

Key Takeaways
A used caliper can be a sensible repair, but only when its fit and condition are verified carefully.
- Match the caliper to the exact Haval model, year, axle, and braking package.
- Inspect the casting, piston, seals, slider hardware, and bleed screw before buying.
- Ask whether the part was tested, refurbished, or sold without inspection.
- Replace damaged seals and hardware rather than treating them as minor details.
- Bleed, test, and bed in the brakes before returning the vehicle to normal driving.
Understanding second hand Haval brake calipers
Buying second hand Haval brake calipers can reduce repair costs, but the saving only matters if the part is correct and serviceable. A caliper is a safety-critical component, so appearance alone is never enough. The right approach is to identify the original specification, inspect the replacement closely, and plan for proper installation.
What brake calipers do in the braking system
A brake caliper presses the pads against the rotating brake disc when hydraulic pressure reaches its piston. That friction slows the wheel, while the caliper body and its mounting hardware keep the pressure aligned. If the piston sticks or the caliper cannot move as designed, braking may become uneven and the pads can wear prematurely.
The caliper works as part of a system that also includes the disc, pads, brake hose, fluid, and wheel hub. A replacement that looks similar but uses different mounting points or pad dimensions may create problems even if it can be physically attached.
Common Haval models and caliper compatibility
Compatibility must be checked against the exact vehicle rather than the badge alone. Model names can cover several generations, engines, trim levels, and brake packages, and the same model may use different front and rear assemblies. Vehicle identification details and the original caliper are more useful than a broad model search.
When searching catalogues, a HAVAL parts catalogue can help narrow the search, while a seller should still confirm the vehicle details manually. In the UAE, a Haval spare parts search may also connect buyers with used and new listings, but the final match should be based on verified specifications.
Fixed versus floating caliper designs
A floating, or sliding, caliper normally uses one or more pistons on one side and moves on slider pins so both pads contact the disc. A fixed caliper stays in position and may use pistons on both sides. The design affects the mounting arrangement, pad shape, servicing procedure, and the way wear should be assessed.
Do not assume that a caliper from the same axle can substitute for another design. Differences in piston count, bracket shape, hose entry, and pad retention can make an otherwise similar part unsuitable.
When used calipers are a practical replacement
A used caliper is most practical when the original unit has a damaged casting, seized piston, badly corroded bore, or missing hardware and a confirmed replacement is available. It can also make sense when a complete new assembly is disproportionately expensive for an older vehicle. The decision should account for inspection, cleaning, seals, fluid, and labor rather than the listing price alone.
A sound used unit with a clear history is preferable to an untested part that merely looks clean. Condition matters more than appearance when hydraulic components are involved.
Checking compatibility before you buy
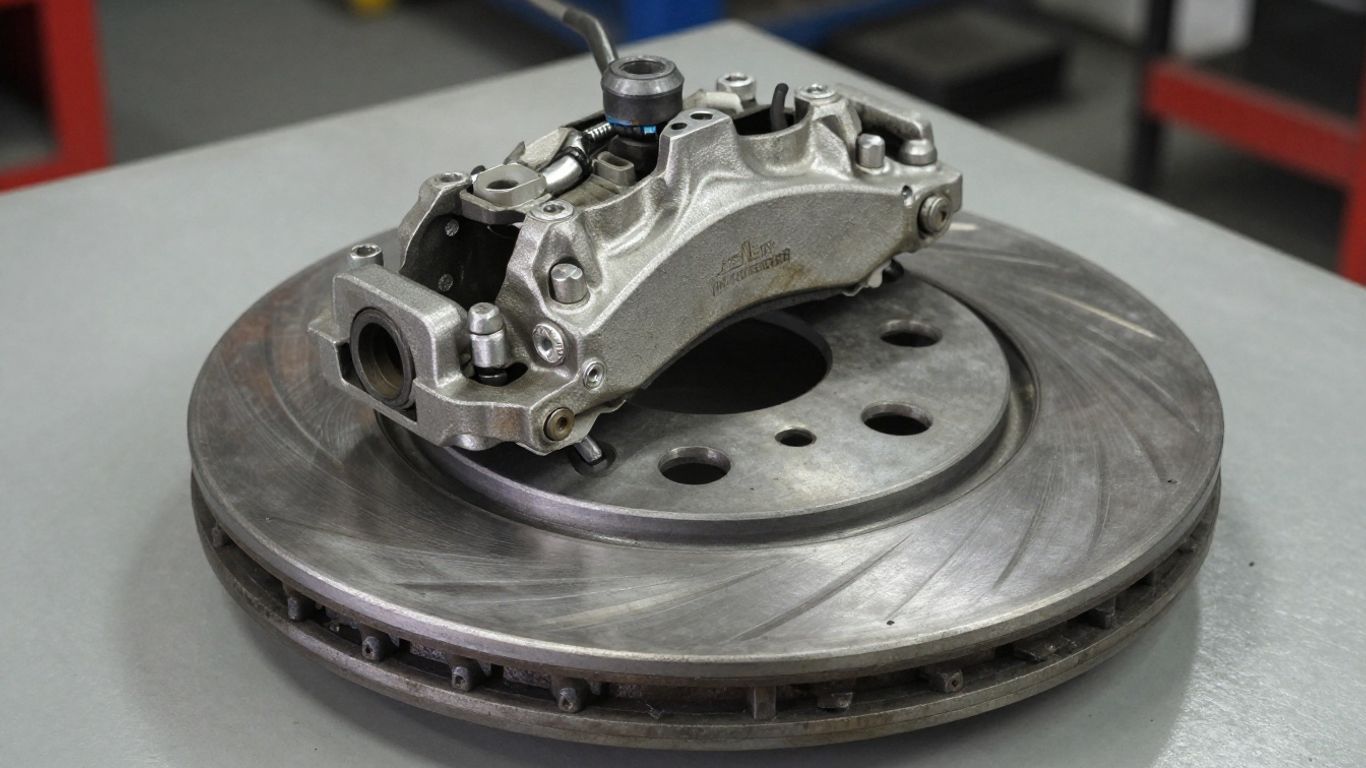
Before money changes hands, gather the vehicle identification number, model year, engine or trim information, axle position, and details from the original caliper. Compare photographs and measurements, but treat them as supporting evidence rather than proof. If a supplier cannot answer basic fitment questions, keep looking.
Matching the exact Haval model and model year
Start with the registration or vehicle identification information and confirm the production year. Facelifts and equipment changes can introduce different brakes within a familiar model name. Ask whether the listing is for the left or right side, since some parts are handed and the hose or bleeder position may differ.
A marketplace search such as Haval replacement parts can reveal many listings, but a large selection does not remove the need to check the exact application. Save screenshots of the listing and the seller’s fitment statements before purchasing.
Comparing front and rear caliper specifications
Front and rear calipers are not interchangeable simply because they belong to the same vehicle. Compare piston diameter, mounting ear spacing, disc thickness, pad shape, bracket design, and whether the rear assembly incorporates a parking-brake mechanism. Also verify whether the listing includes a bracket, carrier, pins, clips, and pad-retaining hardware.
The hose connection deserves particular attention. A different thread, banjo orientation, or sealing arrangement can make installation unsafe even when the caliper body appears close to the original.
Verifying part numbers and mounting points
Read every number cast or stamped on the caliper, then compare it with the number on the original component or a reliable parts record. Numbers can identify a family of parts, but the mounting points and hydraulic connection still need visual confirmation. Measure center-to-center spacing if the seller provides no dependable catalogue reference.
Use photographs to check the shape of the ears, the position of the bleed screw, and the direction of the piston opening. A seller who refuses to provide clear images of these areas is giving you a reason to pause.
Confirming compatibility with the brake discs and pads
The replacement must work with the disc diameter, disc thickness, and pad profile already fitted to the vehicle. A caliper that leaves the pad partly overhanging the disc or cannot accommodate its thickness is not a valid match. Check whether new pads are needed, especially if the old set has worn unevenly.
For a broader repair involving the disc and pads, a brake rotor replacement guide can help you understand the related work. A professional Haval brake service quote may also clarify the expected parts and labor before you decide whether a used caliper is worthwhile.
Inspecting a used Haval brake caliper
Inspection should happen in good light, with the caliper cleaned enough to reveal cracks, fluid residue, and damaged rubber. Ask for photographs of the piston opening, mounting ears, hose port, and bleeder. If you can inspect the part in person, compare it directly with the unit being removed.
Signs of corrosion, cracks, and impact damage
Light surface rust on an exterior cast surface may be treatable, but deep scaling around the piston bore, mounting ears, or hose connection is more serious. Look for fractures, gouges, bent brackets, crushed dust shields, and evidence that the caliper was dropped. Paint or fresh coating can hide damage, so inspect edges and recesses carefully.
Corrosion around the pad abutments can restrict pad movement. That may cause drag, heat, and uneven wear after installation, even when the hydraulic piston itself works normally.
Checking the piston and piston bore
The piston should move smoothly and its exposed surface should not be deeply pitted, scored, or covered in flaking corrosion. The bore area behind the dust boot deserves equal attention because rust there can damage the pressure seal. Do not force a piston with improvised tools or attempt to prove movement by applying uncontrolled air pressure.
If the piston is seized, badly pitted, or visibly tilted, treat the caliper as a refurbishment candidate rather than a ready-to-fit part. A low purchase price does not compensate for an unsafe hydraulic repair.
Evaluating slider pins, boots, and seals
On a floating caliper, slider pins should be straight, clean, and capable of moving through their boots without binding. Torn boots allow water and grit into the guide bore, while hardened seals can permit fluid leakage or piston sticking. Check whether the seller includes the pins and rubber components or is selling only the bare casting.
Replacement boots and seals must be compatible with the caliper. Ordinary grease is not automatically suitable for rubber brake components; use the lubricant specified for the application.
Identifying leaks and uneven wear
Fluid staining around the piston seal, bleeder screw, or hose port indicates that the caliper needs further work before use. Uneven pad wear on the original assembly can point to a sticking piston, restricted slider, or hose problem, so replacing only the caliper may not resolve the underlying fault.
A wet caliper should never be cleaned and sold as ready to install without identifying the source. Ask for evidence of pressure testing if the seller describes the part as tested.
Assessing the seller and part condition
The seller’s description should explain what was inspected, what is included, and whether the component is sold with any return protection. Clear answers are more useful than polished photographs. For high-risk parts, a modest warranty can be worth more than a small discount.
Questions to ask about the caliper’s history
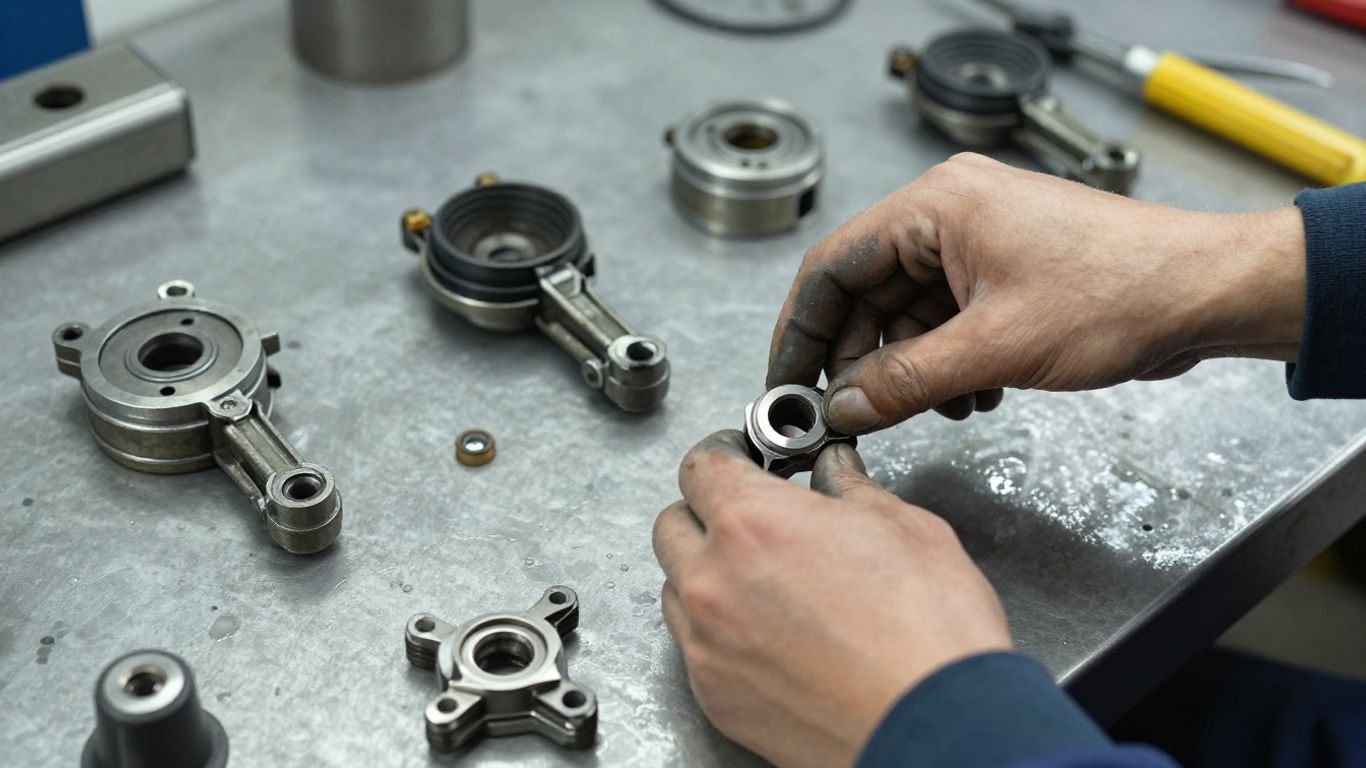
Ask which vehicle the caliper came from, how many kilometers or miles it had covered if known, and whether it was removed because of a fault or simply during dismantling. Confirm whether the piston moved, whether the part was pressure tested, and whether the bleed screw and hose port are undamaged.
It is also useful to ask whether the caliper was stored with the hydraulic opening protected. Open ports can admit dirt and moisture, and a part left exposed may require more extensive cleaning or rebuilding.
Comparing refurbished, tested, and untested parts
These descriptions are not interchangeable. A refurbished caliper should come with a clear account of what was replaced and inspected. A tested caliper may have passed a functional or pressure check without receiving new seals. An untested caliper should be priced and treated as a core for possible rebuilding, not as a guaranteed installation-ready component.
The difference can be organized simply:
| Part description | What it may indicate | What to confirm |
|---|---|---|
| Refurbished | Cleaned and rebuilt with selected replacement parts | Which seals, boots, and hardware were replaced |
| Tested | Checked for movement or hydraulic function | What test was performed and when |
| Untested | Removed from a vehicle without verification | Return terms and likely refurbishment cost |
That distinction helps prevent a cheap listing from becoming an expensive repair. If the seller uses vague terms such as “good condition,” ask for a specific inspection record.
Reviewing photos, warranties, and return policies
Photos should show all mounting faces, the piston opening, seal area, bleeder, hose port, and casting. A return policy should state the time limit, acceptable installation conditions, and whether labor is excluded. Keep the listing, messages, invoice, and photographs together until the part has been fitted and tested.
A warranty is not a substitute for inspection, but it reduces the risk of receiving the wrong side or a component that fails immediately. Check who pays return freight and whether the seller accepts returns after brake fluid has been introduced.
Understanding salvage-yard and online marketplace risks
Salvage-yard parts may offer useful provenance, but storage conditions and dismantling methods vary. Online marketplaces make comparison easy while also increasing the chance of inaccurate fitment, stock photographs, incomplete descriptions, and mixed-quality inventory.
For any purchase, use a biomedical equipment maintenance program as an unlikely but useful reminder of the value of records: document what was inspected, when it was bought, and what was changed. For printed service records or workshop instructions, dynamic QR code management can also be useful, provided the linked information stays current. These tools do not validate a caliper; they simply help keep maintenance information organized.
Preparing a second hand caliper for installation
Preparation depends on the inspection result and the seller’s description. Some parts need only cleaning and new hardware, while others should be completely dismantled and rebuilt by a brake specialist. Never install a component simply because it can be bolted on.
Cleaning and removing surface rust
Use a suitable brake cleaner and non-aggressive tools to remove dirt and loose surface rust. Keep abrasive debris away from the piston bore, seal grooves, hose port, and bleeder passage. Do not grind a mounting face or alter the casting to make a poor fit seem acceptable.
After cleaning, inspect the metal again. Surface discoloration may disappear, but deep pitting, cracks, and distortion will remain visible and should guide the repair decision.
Replacing seals, dust boots, and bleed screws
Rubber components that are cracked, stretched, hard, or contaminated should be replaced with parts intended for that caliper. A damaged bleeder screw can prevent proper bleeding and may leak under pressure. If the screw is seized, avoid excessive force that could break it inside the caliper.
Use clean brake fluid or the specified assembly lubricant during seal installation. Keep all hydraulic surfaces free from grease, lint, and grit.
Choosing compatible brake pads and hardware
Pads should match the caliper and disc specification, not just the vehicle’s general model name. Replace bent clips, worn abutment hardware, missing retaining pins, and damaged slider boots. If the old pads wore unevenly, investigate the cause before fitting new ones.
Buy hardware as a complete, compatible set when possible. Mixing unknown clips or pins can allow movement, noise, or incorrect pad seating.
Deciding when professional refurbishment is needed
Professional rebuilding is sensible when the piston is seized, the bore is corroded, the seals are damaged, or the caliper requires pressure testing. It is also the safer choice when you lack the tools or experience to dismantle and reassemble hydraulic components.
A specialist can determine whether the casting is reusable and whether the finished caliper holds pressure. If there is any doubt about structural integrity, replacement is safer than attempting to rescue the part.
Installing and testing the replacement caliper
Brake work should be performed on a stable, properly supported vehicle with the wheel secured against movement. Have the correct tools, fluid, torque information, and a method for catching fluid ready before opening the system. If the procedure or condition is uncertain, use a qualified technician.
Removing the old caliper safely
Support the vehicle on approved stands and remove the wheel. Do not allow the caliper to hang from the flexible brake hose; support it with a suitable hook or strap. Cap or protect the hose and openings in a clean manner if the system must remain open during the work.
Compare the removed caliper with the replacement before discarding anything. This is the last easy opportunity to identify differences in side, bracket, hose entry, or hardware.
Fitting the replacement without damaging the brake hose
Install the caliper and bracket using clean, undamaged fasteners and the specified tightening procedure. Route the hose exactly as before, ensuring it does not twist, rub against the wheel, or become tight at full steering or suspension travel. Use new sealing washers where the connection requires them.
Check that the pads sit squarely, the retaining hardware is secure, and the disc rotates without abnormal contact. Do not rely on a test drive to reveal a hose that was installed under tension.
Bleeding the brake system and checking for leaks
Bleed the affected circuit using the vehicle’s prescribed sequence and the correct brake fluid. Keep the reservoir from running dry, and inspect the hose connection, bleeder screw, piston area, and nearby lines while pressure is applied. The pedal should become firm without a continuing sink.
A dual-platform review card has nothing to do with hydraulic repair, but its underlying lesson about clear follow-up applies here: record what was done and revisit any warning sign rather than assuming the job is finished. If fluid leaks or air continues to enter, stop and diagnose the fault before driving.
Bedding in the brakes and verifying braking performance
After confirming the pedal and checking for leaks, begin with low-speed stops in a safe area. The pads and disc may need a controlled bedding procedure appropriate to their manufacturer’s instructions. Avoid repeated hard braking immediately after installation because excessive heat can affect the new friction surfaces.
The vehicle should stop straight, without pulling, grinding, vibration, or a burning smell. A service record system can help keep future inspection details together, although the caliper itself must still be assessed by physical checks and road testing.
Costs, safety, and long-term maintenance
The purchase price is only one part of the repair. A used caliper may need seals, pins, pads, fluid, cleaning, testing, or professional labor before it is ready. Compare the complete installed cost with a refurbished or new assembly, especially if the vehicle is used for long trips or carries passengers regularly.
Comparing used, refurbished, and new caliper prices
An untested used caliper is usually the cheapest option but carries the greatest uncertainty. A refurbished unit costs more because inspection and replacement components are included. A new unit generally offers the clearest condition baseline, although availability and price may vary.
Request comparable quotes that include the same contents: caliper body, bracket, hardware, seals, and any core charge. Otherwise, a low price may simply exclude items you will need later.
Estimating labor, brake fluid, and related parts
Add labor for removal, fitting, bleeding, inspection, and possible diagnosis of the original fault. Include fluid, sealing washers, slider hardware, pads, and a disc if the existing friction surface is damaged. If the old caliper caused overheating, inspect the wheel bearing, hose, and disc as well.
A proper estimate should separate parts from labor and identify whether testing or refurbishment is included. That makes a used-part decision easier to compare with a complete repair quote.
Knowing when replacement is safer than repair
Replacement is the safer choice when the casting is cracked, the bore is deeply corroded, the mounting points are distorted, or the component cannot hold pressure. It is also preferable when the cost of rebuilding approaches the cost of a known-good refurbished or new part.
Brakes are not a suitable place to accept uncertain improvisation. If the caliper’s history and condition cannot be established, choose a source that can provide a verifiable replacement or have the vehicle inspected professionally.
Inspecting the caliper during routine brake servicing
At every brake service, look for fluid residue, torn boots, seized sliders, uneven pad wear, disc discoloration, and restricted movement. Check that the bleeder remains accessible and that the hose is not rubbing or twisting. Early attention can prevent a small rubber or lubrication problem from becoming a hydraulic failure.
Keep notes about the part number, installation date, mileage, and work completed. Consistent records make future diagnosis faster and help the next technician understand what has already been changed.
Conclusion
Second hand Haval brake calipers can be a practical way to control repair costs when fitment is verified and condition is treated seriously. Match the part carefully, inspect the hydraulic and mechanical details, allow for refurbishment where needed, and finish with proper bleeding and testing. A modest saving is worthwhile only when the completed repair is dependable.
Frequently Asked Questions
Are second hand Haval brake calipers safe to use?
They can be safe when the correct part is thoroughly inspected, suitably refurbished when necessary, and tested after installation. An untested or damaged caliper should not be fitted merely because it is inexpensive.
How do I know whether a used caliper fits my vehicle?
Confirm the exact model year, axle, side, brake package, part number, mounting points, disc dimensions, pad shape, and hose connection. Compare the replacement with the original component before purchase.
Should I replace the brake pads with a used caliper?
Often it is sensible, particularly if the old pads are worn unevenly, contaminated, or shaped by a sticking caliper. The new pads must match the disc and caliper specification.
Can surface rust be removed from a used caliper?
Light external surface rust may be cleaned, but rust in the piston bore, seal grooves, mounting areas, or hydraulic passages can make the caliper unsuitable without professional rebuilding.
How can I tell if a caliper is leaking?
Look for wetness or fluid residue around the piston seal, bleeder screw, hose connection, and casting. A sinking pedal or recurring air in the system also requires immediate diagnosis.
Do used calipers need new seals?
Not every caliper does, but cracked, hardened, contaminated, or unknown-age seals and dust boots should be replaced. The work should use components designed for that caliper.
What should I do if the vehicle pulls after installation?
Stop driving normally and inspect the caliper, pads, hose, slider movement, disc, and opposite side. Pulling can indicate uneven hydraulic pressure, binding, contamination, or another brake-system fault.