

Key Takeaways
A sound replacement begins with identification, not price. Match the unit carefully, test the charging system, and inspect the part before fitting it.
- Confirm the exact model, year, engine code, connector, and part number.
- Test the battery, alternator, belt, grounds, and wiring before buying.
- Ask sellers for mileage, removal details, photographs, and test evidence.
- Compare the complete cost, including shipping, warranty, and installation.
- Verify belt tension, charging output, warning lights, and operating noise after installation.
Understand your Haval’s alternator requirements
Alternators that look nearly identical can differ in output, mounting, pulley design, or electrical connections. The safest approach is to identify the original unit and compare it with vehicle records before searching stock. That discipline matters more than choosing the cheapest listing.
Match the alternator to the exact Haval model and year
Start with the model, production year, body specification, and engine size. A Haval Jolion and an H6 may share some design conventions without sharing the same alternator, while mid-year changes can also affect fitment. Use the VIN or the vehicle’s build information whenever a seller offers a compatibility check.
Do not rely on a photograph or a broad phrase such as “fits Haval.” The mounting ears and pulley may appear correct while the electrical connection is wrong, so compare the old unit’s physical arrangement with the listing before paying.
Check the engine code and electrical specifications
Record the engine code, rated output, voltage, connector style, and pulley arrangement from the original part or a trusted parts catalogue. Engine codes are especially useful when a listing covers several versions of the same model. If a specification is missing, ask the seller to confirm it rather than assuming the most common version applies.
A useful reference listing may identify the engine, mileage, VIN, and stock number together, as shown in this used Jolion alternator listing. Treat those details as identification evidence, not as proof that every similar vehicle will fit.
Compare OEM and aftermarket part numbers
Write down every readable number on the housing, label, or regulator. Some numbers identify the original manufacturer, while others identify a supplier or catalogue application; matching only one number can create false confidence. Cross-reference the complete number string and confirm that any supersession is documented.
A new aftermarket unit may be perfectly serviceable, but its connector and control strategy still need to match. A used unit is worthwhile only when the seller can explain the relationship between the listed number and the number on your vehicle.
Consider charging capacity and connector configuration
Charging capacity should suit the vehicle’s electrical load, battery type, and control system. Check the main output terminal, plug shape, terminal count, and cable orientation, then compare the pulley width and alignment with the belt path.
The same care applies to apparently unrelated purchasing decisions: compatibility details matter in water filtration components as well as vehicle parts. Here, the practical lesson is simple—dimensions and connections should be verified before a transaction, not after installation.
Diagnose the alternator before buying a replacement
A replacement will not cure a loose ground, worn belt, damaged cable, or exhausted battery. Begin with symptoms, then test the system in a repeatable way. This avoids spending money on used Haval alternators when the original unit is still serviceable.
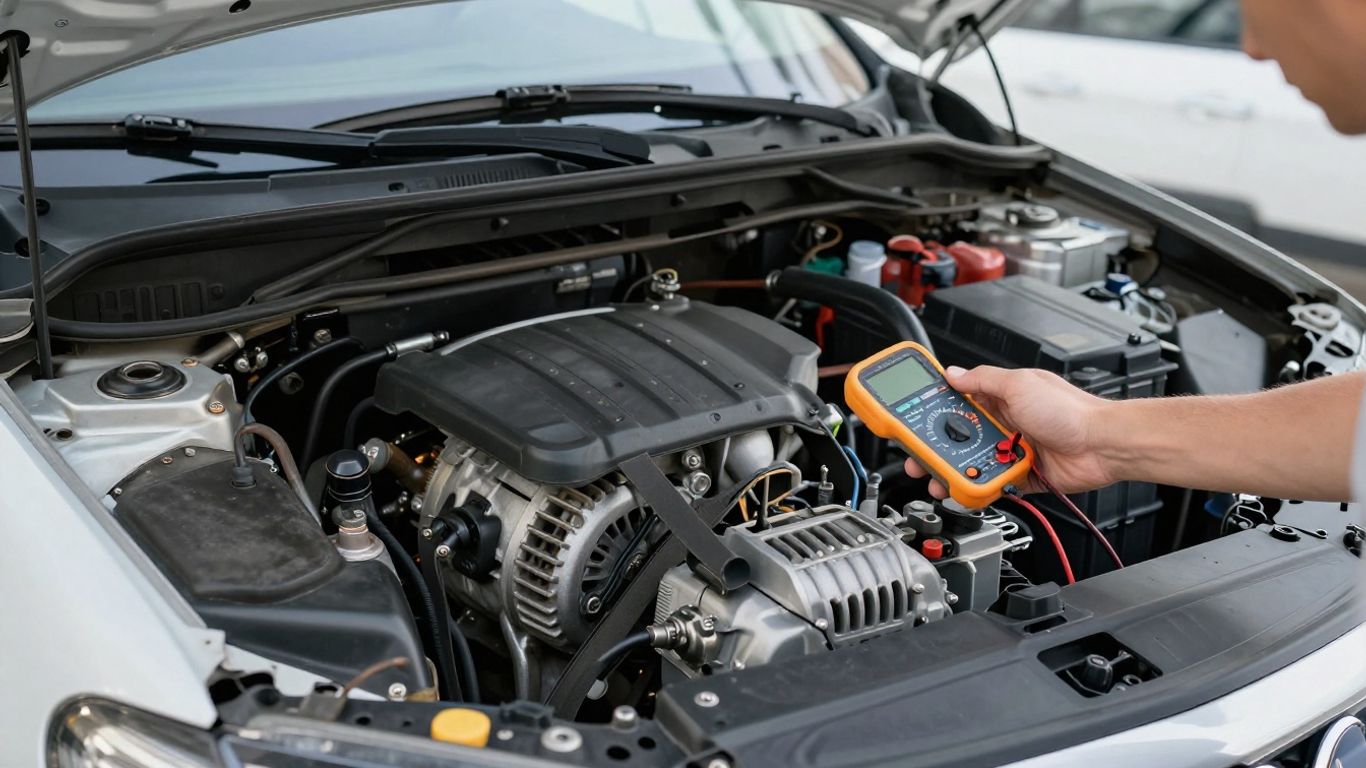
Recognize common alternator failure symptoms
A dimming dashboard, battery warning light, slow electrical accessories, repeated flat batteries, or unusual whine can point toward charging trouble. Symptoms may appear together or only under load, so note when they occur and whether the engine is cold or warm.
A burning smell or grinding sound deserves caution. Stop driving if the belt is fraying, the pulley is wobbling, or the warning light remains on, because continued operation can create additional electrical or mechanical damage.
Test battery voltage and charging output
Use a properly rated multimeter and begin with the engine off, allowing the battery to rest if possible. Then measure at idle and again with headlights, blower, and other normal loads operating. Compare the readings with the vehicle maker’s specifications rather than applying one universal pass number.
Measure at the battery and, where practical, at the alternator output terminal. A large difference between those points suggests cable or connection resistance rather than a failed alternator. Test before replacing is the habit that saves the most wasted effort here.
Distinguish alternator faults from battery problems
A battery can hold too little charge even when the alternator is working, especially after repeated deep discharge. Conversely, a strong battery can hide a weak charging system for a short time. A load test, resting-voltage check, and charging test together provide a clearer diagnosis than any single reading.
Ask whether the battery is the correct type and age for the vehicle. If it fails a proper test, replace or charge it as appropriate before judging the alternator’s output again.
Identify wiring, belt, and ground connection issues
Inspect the serpentine belt for glazing, cracks, contamination, and slack, and check that it tracks squarely on every pulley. Examine the positive cable, ground straps, connector, and fuse or fusible link for looseness, heat damage, or corrosion.
Clean and tighten only connections that are safe to service, and do not bypass a fuse. A wiring fault can mimic alternator failure, while a slipping belt can produce low output without an internal electrical defect.
Find reliable used Haval alternators
Seller quality affects the purchase as much as part condition. A professional listing should identify the donor vehicle, show the actual unit, and explain its testing and return terms. Compare evidence rather than assuming a low price signals value.
Compare salvage yards, auto recyclers, and specialist sellers
Salvage yards may offer broad stock and useful donor-vehicle information, while specialist sellers may provide more detailed photographs or testing records. Ask how the part was removed, stored, and labelled, and whether the warranty covers both fitment and function.
For regional searches, Haval alternators for sale can help compare availability and quoted prices across suppliers. Still, the final decision should rest on exact identification and written terms, not on search convenience alone.
Evaluate listings for Haval Jolion and Haval H6 parts
Search by model, year, engine code, and part number together. A listing for a 1.5-litre turbo vehicle should not be treated as interchangeable with a 2.0-litre application merely because both parts are called an alternator.
Likewise, a listing for a 2022 Haval H6 may include useful donor details but still require confirmation of the exact engine and connector. Use the seller’s application notes as a starting point and request a VIN-based check where available.
Verify mileage, vehicle history, and removal date
Mileage gives context but does not measure internal condition by itself. Ask whether the donor vehicle was running when dismantled, why it was scrapped, and when the alternator was removed. A recent removal with traceable stock information is generally easier to evaluate than an anonymous shelf part.
Keep a record of the seller’s answers and the listing photographs. One current listing describes 72,110 miles and a three-month warranty; that is useful information to compare, but it is not a guarantee of remaining service life.
Ask for clear photos and full part-number details
Request close images of the label, pulley, mounting ears, plug, output stud, and any visible damage. The photographs should show the actual part rather than a catalogue image. Ask the seller to confirm that the pictured number is legible and belongs to the unit being sold.
Packaging and delivery details also matter when buying from a distance. A shipping and tracking option can clarify dispatch timing and packaging, but it does not replace fitment confirmation or a functional warranty.
Inspect a used Haval alternator before purchase
Inspection cannot reveal every internal defect, but it can eliminate many risky units. Look for evidence of careless removal, long exposure to moisture, impact, or oil leakage. If an inspection is impossible, make sure the return process is practical and documented.
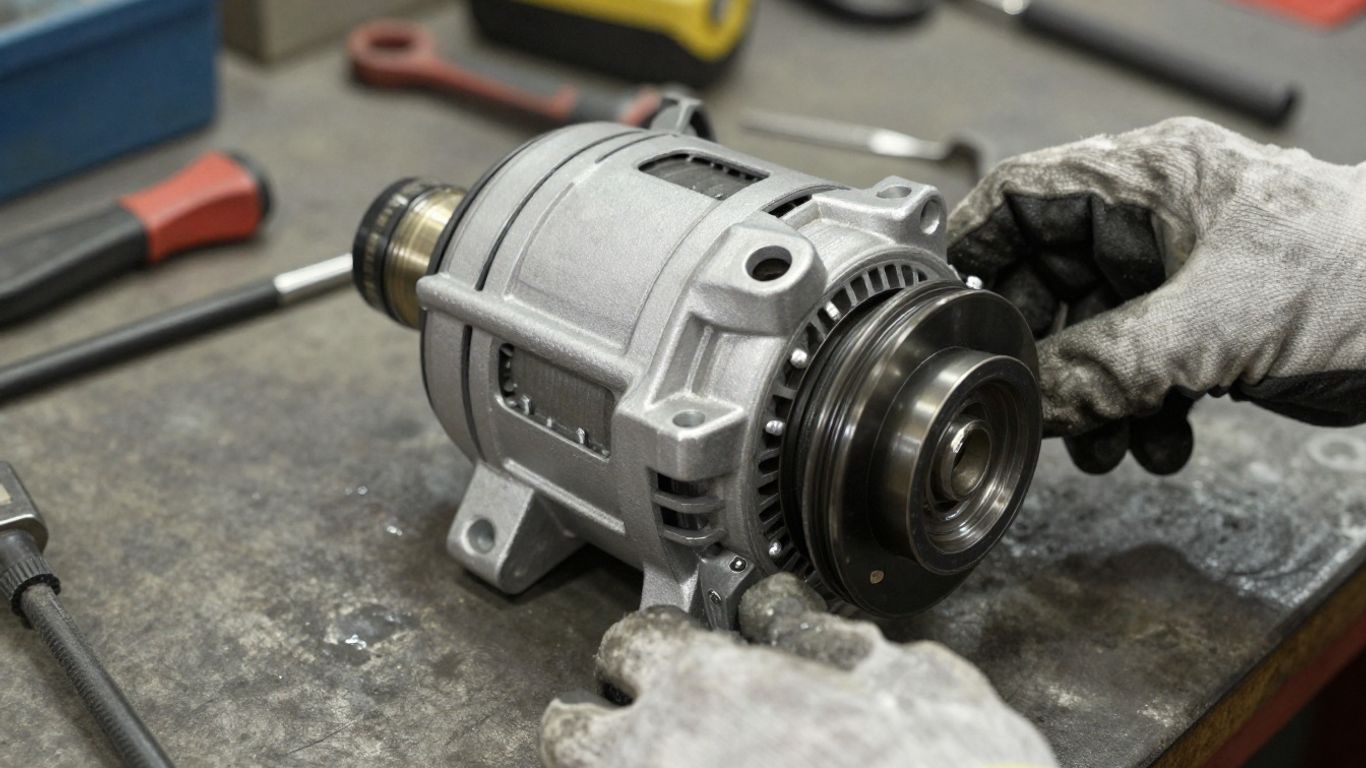
Examine the housing, pulley, and mounting points
Check that the aluminium housing is not cracked, heavily distorted, or repaired with an uncertain weld. Mounting ears should be straight, threaded holes clean, and the pulley aligned with the original belt path.
Turn the pulley by hand if the design permits it. Light resistance may be normal, but roughness, scraping, excessive wobble, or a damaged one-way mechanism is a reason to reject the part or request specialist testing.
Check the rotor, bearings, and brush condition
A bench inspection should include shaft play and bearing feel, not just external cleanliness. If the regulator and brush assembly can be accessed without damaging the unit, check for severe brush wear and uneven contact surfaces.
Do not dismantle a sealed or warranty-covered alternator casually. Instead, ask for a professional test report that states what was checked and whether the output was measured under load.
Look for corrosion, oil contamination, or impact damage
Surface dust is less concerning than white corrosion around fasteners, green residue at terminals, or oil inside the housing. Oil can damage brushes and slip rings over time, while impact marks may indicate a bent shaft or hidden mounting stress.
Inspect the rear cover, vent openings, and cable studs with a bright light. A clean exterior is helpful, but it should never be used as a substitute for electrical testing.
Confirm the regulator and connector are intact
The regulator must be secure, and the plug should have straight terminals, an unbroken lock, and no signs of heat distortion. Compare its position and connector keying with the original unit before accepting the part.
If the regulator is sold separately or has been replaced, ask for the exact replacement number and test evidence. A visually correct alternator with an incompatible control circuit can still fail immediately after fitting.
Assess price, warranty, and value
The cheapest purchase price is only one part of the calculation. Include the chance of a second removal, return shipping, lost vehicle time, and diagnostic labour. A slightly more expensive tested unit may be less costly overall.
Compare used, refurbished, and new alternator costs
Used units usually offer the lowest initial price, while refurbished units may include renewed wear components and a bench test. New units can provide the clearest warranty position, though their specification still needs verification.
Compare like with like: output rating, connector, warranty duration, and included components. A price comparison should resemble the reasoning in an acquisition valuation guide: separate headline price from the risks and costs that affect real value.
Calculate shipping, core charges, and installation expenses
Add delivery, taxes, packaging, a possible refundable core charge, and any required belt or fastener. If access is difficult, include labour or the value of your own time. A part that appears inexpensive can become poor value once a failed first attempt is counted.
Write the total beside the seller’s warranty and expected delivery date. This simple comparison makes it easier to reject a bargain that offers little protection.
Review testing evidence and return policies
Look for a dated test result, output measurement, or a clear description of the bench procedure. Confirm whether the warranty starts on dispatch or delivery, whether labour is excluded, and how quickly a defect must be reported.
Read the return conditions before installation. Some sellers accept returns only if the unit is unmodified and the original packaging is retained, which can affect how you handle the part during diagnosis.
Decide when a refurbished unit offers better value
Refurbishment may be sensible when the unit has a sound housing and pulley but needs brushes, bearings, or a regulator. Ask which components were replaced, whether the rotor and slip rings were measured, and whether the finished unit was tested under load.
A refurbished alternator is not automatically superior to a clean used unit. Its advantage comes from documented work and meaningful warranty coverage, not from the label alone.
Prepare for alternator replacement
Read the vehicle-specific service instructions before starting, since access and belt routing vary. Work on a cool engine in a stable, well-lit area, and keep the replacement beside the original for a final comparison. If the repair involves high-current wiring or difficult access, professional help is sensible.
Gather the correct tools and replacement components
Prepare sockets, extensions, wrenches, a belt tool if required, a multimeter, protective gloves, and a light. Have the correct alternator, belt if inspection shows wear, replacement fasteners where specified, and a belt-routing reference ready.
A practical alternator replacement guide can help organize tools and sequence, but the vehicle’s own service information takes priority. Never force a mounting bolt because a misaligned unit may be the wrong part.
Disconnect the battery safely
Switch off the ignition, remove the key, and wait for systems to power down according to the service instructions. Disconnect the negative terminal first and isolate it so it cannot spring back into contact.
Some vehicles have memory, alarm, or high-voltage system considerations. Follow the prescribed procedure and avoid probing live terminals with metal tools.
Remove the belt and electrical connections
Photograph or sketch the belt route before loosening the tensioner. Release tension in the correct direction, remove the belt without levering against delicate components, and label electrical connections if their positions are not obvious.
Support the alternator as its final fastener comes out. Keep nuts, spacers, and insulating washers together; a missing insulator can create a short or charging fault after reassembly.
Protect nearby wiring and engine components
Cover exposed connectors and keep tools clear of the battery positive terminal. Do not pull on wiring to move the alternator, and inspect nearby hoses and harness clips while access is open.
Clean the mounting faces lightly so the unit seats squarely, but do not remove material or disturb specified grounds. Good preparation prevents small alignment problems from becoming repeat repairs.
Install and verify the replacement alternator
Compare the replacement with the old unit one final time before tightening anything. Confirm the pulley plane, connector, mounting points, and output terminal, then install it without forcing the hardware. Verification is part of the repair, not an optional final flourish.
Secure the alternator and set correct belt tension
Seat the alternator fully against its mounting faces and tighten fasteners to the vehicle’s specified torque. Route the belt exactly as documented, ensuring every rib sits in the pulley grooves before releasing the tensioner.
The belt should not be judged by guesswork alone. Check the specified tension or automatic-tensioner position, then rotate the engine only as directed to confirm that the belt tracks correctly.
Reconnect the wiring and battery
Restore the output cable, plug, grounds, insulating washers, and protective covers in their original positions. A loose high-current connection can heat up quickly, so check that terminals are clean and secure.
Reconnect the battery only after tools are clear and all electrical connections have been checked. Reinitialize vehicle settings if the service procedure requires it.
Test charging voltage under different loads
Start the engine and observe the warning light, then measure charging voltage at idle and with normal electrical loads applied. Compare the readings with the manufacturer’s specifications and check for excessive fluctuation.
Test at both the battery and alternator where practical. If the values differ materially, investigate cable resistance, grounds, or fuse links before condemning the replacement.
Monitor for warning lights, noise, and recurring faults
Listen for bearing rumble, belt squeal, scraping, or a changing whine, and watch for a returning battery warning light. Recheck the belt path and terminal temperatures after a short run, following safe workshop practice.
Keep the invoice, part number, test readings, and warranty details. If the fault returns, those records help separate a defective unit from an unrelated battery, wiring, or belt problem.
Conclusion
Choosing used Haval alternators successfully comes down to careful identification, honest diagnosis, and documented inspection. Match the exact application, calculate the complete cost, and verify the charging system after installation; those steps give a cheaper replacement the best chance of becoming a dependable repair.
Frequently Asked Questions
How long can a used alternator last?
Remaining life varies with mileage, heat, bearing condition, brush wear, storage, and electrical load. A test result and warranty provide better guidance than age alone.
Can a weak battery damage an alternator?
A failing or deeply discharged battery can make the charging system work harder and may contribute to premature wear. Test both components rather than replacing only the battery or alternator by assumption.
Should I replace the belt with the alternator?
Replace the belt if it is cracked, glazed, contaminated, stretched, or otherwise near the end of its service life. A sound belt does not automatically need replacement.
What does an alternator warning light mean?
It usually indicates a charging-system problem, but the cause may be the alternator, belt, wiring, fuse link, or connection. Confirm the fault with voltage and continuity checks.
Is a refurbished alternator better than a used one?
It can be, if the refurbishment work is specified, the unit is load-tested, and the warranty is meaningful. The word refurbished alone does not establish quality.
Can I install an alternator without disconnecting the battery?
Do not do so. Disconnecting the negative terminal according to the vehicle’s service procedure reduces the risk of short circuits and injury.
What should I do if the replacement still does not charge?
Stop and repeat the diagnosis: check belt routing, grounds, output cables, connector seating, fuses, battery condition, and voltage at more than one test point. Contact the seller before modifying a warranty-covered unit.