

Key Takeaways
A used steering rack can be a sensible repair choice, but fitment and condition matter more than a low asking price. Verify the exact vehicle details, inspect the assembly carefully, and budget for installation and alignment.
- Match the rack to the exact model, year, drivetrain, steering layout, and part number.
- Check seals, boots, tie rods, housing, brackets, connectors, and corrosion before buying.
- Compare the full installed cost of used, rebuilt, and new replacement parts.
- Confirm the seller’s testing information, warranty, return terms, and removal history.
- Treat bleeding, calibration, wheel alignment, and final safety checks as part of the repair.
Understanding used Haval steering racks
A steering rack is a safety-critical part, so buying a used unit calls for more care than shopping for a cosmetic or easily interchangeable component. The right rack must match the vehicle’s steering system and physical mounting arrangement, and it must arrive in condition suitable for installation. A careful buyer starts by understanding what the assembly does, then works through fitment and inspection before discussing price.
The term “rack” can also describe slightly different assemblies depending on the vehicle. Some include tie rods or electronic components, while others are sold as the rack housing only. That distinction affects both compatibility and the amount of work required after delivery.
What a steering rack does in the steering system
The steering rack converts the rotational movement of the steering wheel into the side-to-side movement that turns the front wheels. The pinion gear engages with the rack bar, while the inner and outer tie rods transfer that movement to the steering knuckles. Bushings and mounting brackets keep the assembly positioned as the suspension moves.
A rack that is worn internally may create looseness, uneven response, or a clunk over rough surfaces. However, similar symptoms can come from tie rods, ball joints, steering-column couplings, wheel bearings, or suspension bushings. That is why a diagnosis should identify the failed component rather than treating every steering complaint as a rack problem.
Hydraulic and electric steering rack differences
Hydraulic systems use fluid pressure to assist steering. They generally have fluid lines, seals, and a pump or hydraulic source that must be considered during removal and installation. A leak may come from a hose or connection rather than the rack itself, although fluid contamination can eventually damage seals and internal surfaces.
Electric power steering may use an electric motor, torque sensor, control electronics, or an integrated steering assembly. Those parts can make a used rack more sensitive to incorrect connectors, impact damage, moisture, and electronic faults. Before buying, establish whether the replacement is hydraulic, electric, or a specific assembly that combines mechanical and electronic components.
Haval models commonly fitted with replacement racks
Listings may identify a rack by model, production range, engine, body style, or a supplier’s stock description. A model name alone is not enough because revisions can occur within the same model line. For example, a listing for the Haval H2 rack and pinion describes a steering component for a particular H2 engine and power specification; it should still be checked against the vehicle identification details before purchase.
The same caution applies when comparing a compact SUV rack with one from another model. Do not assume that a visually similar housing, similar engine size, or shared platform makes the part interchangeable. Ask for the donor vehicle’s year, VIN where available, steering side, and the exact parts included.
Signs that the steering rack may need replacement
Steering that feels heavy, loose, notchy, or inconsistent deserves prompt attention. Fluid beneath the front of the vehicle, damp rack boots, unusual knocking, and steering-wheel vibration can also point toward a problem, although each symptom has other possible causes. A change in steering feel after hitting a curb or pothole is another reason to inspect the rack and its mounts.
Before ordering a replacement, check whether the fault is actually caused by an outer tie rod, alignment issue, low fluid level, damaged boot, or a suspension component. A professional inspection is worthwhile when the symptom is intermittent or when warning lights accompany the steering problem. A confirmed diagnosis saves money by preventing the replacement of a serviceable rack.
How to verify steering rack compatibility
Compatibility is a process of matching several details, not a quick comparison of photographs. Record the vehicle identification number, model, production date, engine and drivetrain information, steering side, and any number stamped or printed on the original assembly. Then compare those details with the seller’s listing and written confirmation.
Photographs are useful, but they cannot prove internal compatibility or electronic programming requirements. If a seller cannot answer basic questions about the donor vehicle or the assembly supplied, pause the purchase until the uncertainty is resolved.
Match the exact Haval model and production year
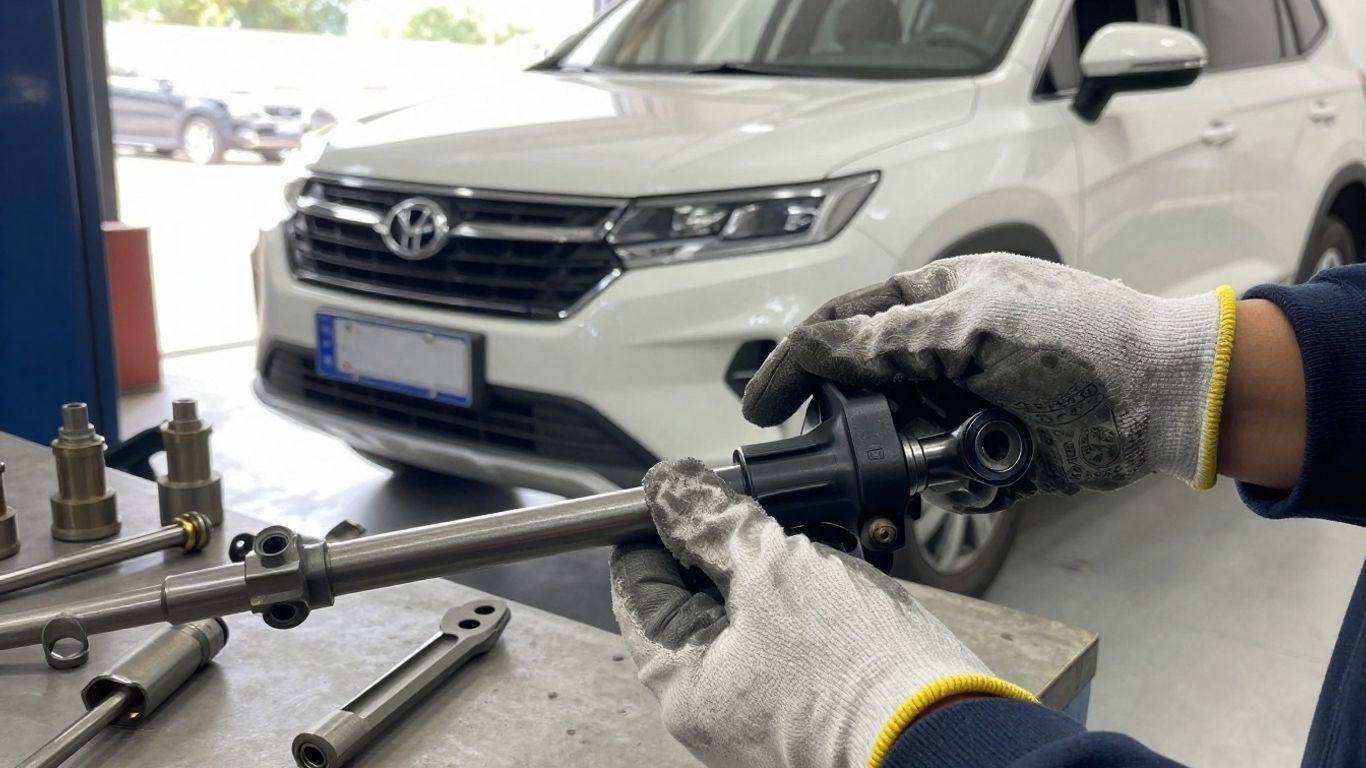
Start with the exact model designation and production year, then check whether the listing covers a narrow production range or a broader one. A mid-year revision can change mounting points, sensors, connectors, or the internal specification. Do not rely on registration year alone if the vehicle was built earlier.
A recycled-parts listing can be helpful when it provides donor details, but those details need to be compared with the buyer’s vehicle. The 2021 Haval Jolion steering rack listing, for instance, identifies a particular production range and notes that the rack is supplied without tie rods. That kind of information is useful precisely because it reveals what the buyer is, and is not, receiving.
Check left-hand-drive and right-hand-drive specifications
The steering wheel position can affect rack orientation, hydraulic line routing, mounting brackets, and the location of electrical connections. A rack intended for left-hand-drive use may not fit a right-hand-drive vehicle even when the model and year appear identical. Confirm the specification in writing rather than inferring it from a stock photograph.
Also compare the position of the input shaft and the angle at which the steering-column coupling meets the rack. If those details differ, installation may be impossible or unsafe. Where the seller uses a generic catalog description, request measurements and images of the actual part.
Compare part numbers, mounting points, and connector layouts
Part numbers provide a strong starting point, but a superseded number should be verified rather than rejected automatically. Compare the number on the original rack with the number on the replacement, and ask whether the seller has confirmed interchangeability. A missing number is not necessarily a deal-breaker, but it increases the need for physical comparison and supplier support.
Make a side-by-side checklist covering the rack body, mounting ears, bolt spacing, input shaft, tie-rod threads, hydraulic ports, electrical connectors, and sensor locations. Three or four matching features do not compensate for one critical mismatch. The assembly must correspond in both mechanical design and any included electronic hardware.
Confirm compatibility with the vehicle’s steering and suspension systems
The rack works as part of a larger system, so check how it connects to the steering column, knuckles, subframe, hydraulic circuit, and electronic controls. A replacement may be mechanically similar but still require a different sensor, connector, calibration procedure, or supporting bracket. Ask whether tie rods, boots, fasteners, and mounting bushes are included or must be transferred.
It is also sensible to compare the intended repair with the likely labor. The Haval power steering parts search describes a way to enter vehicle details, compare used parts, and request quotes; regardless of the source used, the buyer should provide complete vehicle information rather than searching by model name alone. Confirm the final part with the supplier before payment.
How to inspect a used Haval steering rack
A used rack has a history that may not be visible from a single clean photograph. It could have been removed from a running vehicle, recovered after collision damage, stored outdoors, or handled without protective caps. Inspection should therefore combine visual evidence, donor information, and a realistic account of what the seller has tested.
If possible, inspect the actual unit before purchase. For shipped parts, ask for current photographs rather than catalog images, and request views of every side, the shaft, ports, boots, connectors, mounting points, and any identification marks.
Look for leaks, corrosion, and damaged seals
Examine the housing and the areas around seals, hydraulic ports, and boots for wetness, staining, or accumulated dirt. A dry surface is encouraging but does not prove that the rack will remain leak-free under pressure. Cracked boots can allow water and grit into the inner joints, while corrosion around a shaft or seal can cause problems after installation.
Surface discoloration is not automatically fatal, particularly on a steel bracket, but deep pitting, flaking metal, or corrosion around a sealing surface is more serious. Ask how the rack was capped and stored, since open ports and exposed shafts are vulnerable to contamination.
Check the rack housing, tie rods, and mounting brackets
Look along the rack housing for dents, cracks, distorted mounting ears, and impact marks. Rotate the input shaft only as far as the seller permits and note whether movement feels smooth through the normal range. Avoid forcing a component that may be locked or electronically constrained.
Inspect inner and outer tie rods for bent shafts, damaged threads, torn boots, or excessive play. Mounting brackets should be straight, and rubber bushes should not be split or crushed. If the rack is sold without tie rods, price replacement parts before deciding that the advertised price is attractive.
Review mileage, removal history, and storage conditions
Mileage can help compare two otherwise similar units, but it is only one piece of evidence. A lower-mileage rack from a collision-damaged vehicle may be less appealing than a higher-mileage unit removed from a vehicle with a documented mechanical history. Ask why the donor vehicle was dismantled and whether the rack was removed before or after the reported steering fault.
Storage matters as well. Indoor, capped, dry storage is preferable to prolonged exposure to rain, dust, road salt, or uncontrolled temperature changes. A seller who can explain the removal and storage process is generally easier to evaluate than one offering only a generic description.
Ask for testing records and clear component photos
Testing records should state what was checked, when it was checked, and whether the result applies to the complete assembly or only a visual inspection. For an electric unit, ask about electronic testing and fault codes where applicable. For a hydraulic unit, ask whether pressure or leak testing was performed and what components were included.
Request photos with the part number, connectors, shaft, boots, ports, and mounts visible. The broader used steering boxes and racks inventory illustrates why supplier descriptions, testing information, and shipping details all matter when comparing recycled steering components. Do not treat a claim such as “tested” as a substitute for a specific test description.
Evaluating quality and value before buying
The cheapest rack is not necessarily the least expensive repair. A used unit may need tie rods, boots, seals, fluid, fasteners, programming, or extra labor, while a rebuilt or new unit may include some of those items and carry different warranty terms. Compare like with like and write down what each option includes.
A simple cost comparison prevents the purchase price from dominating the decision. This is the same habit used when reviewing used small yacht valuations or motor home ownership costs: the listed price is only one part of the eventual budget.
Compare used, rebuilt, and new replacement racks
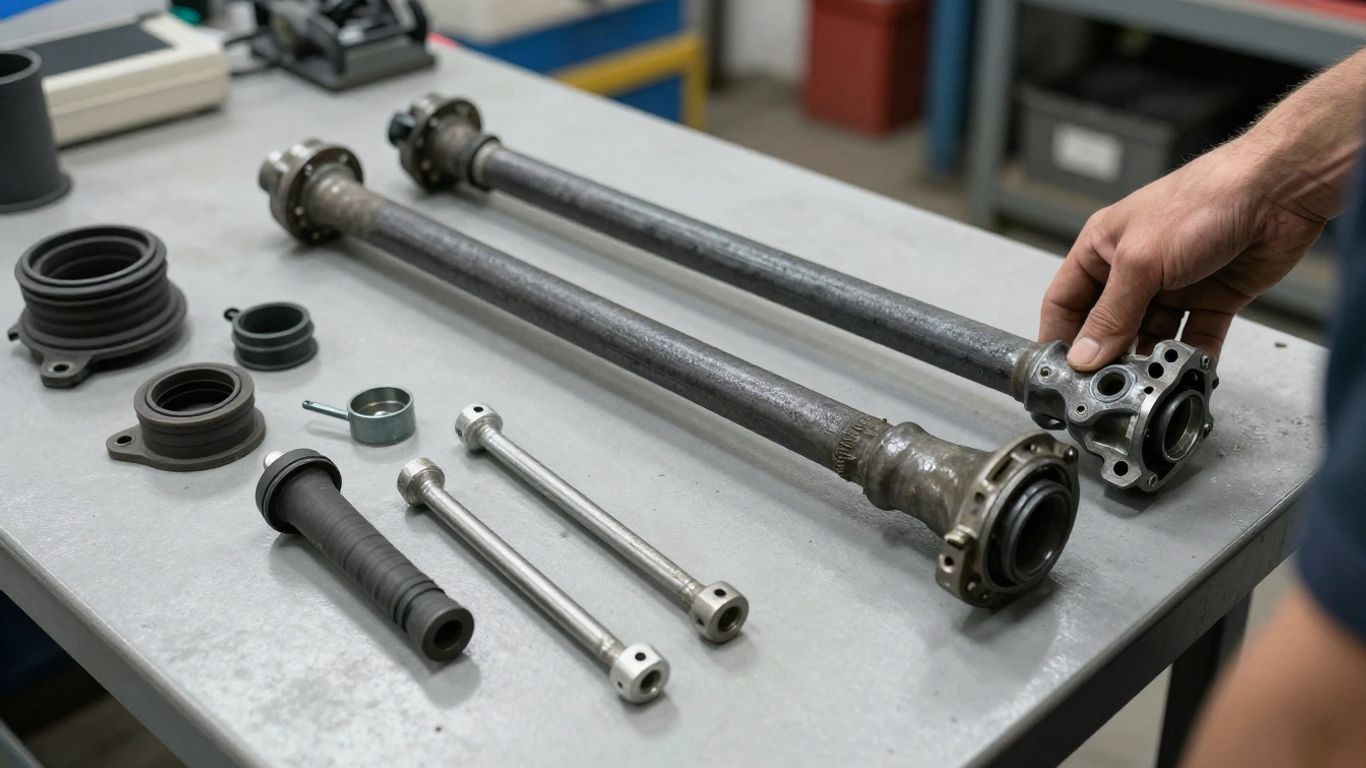
A used rack is typically an original component removed from another vehicle, with its condition depending on mileage, history, and inspection. A rebuilt rack may have seals, bushings, or other wear items renewed, although the exact work varies by supplier. A new replacement is generally sold as a new assembly, but its contents and warranty still need to be confirmed.
Use the following comparison as a framework rather than a promise about any particular listing:
| Option | Potential advantage | Main question to ask | Cost risk |
|---|---|---|---|
| Used | Often a lower purchase price | What are the donor mileage and test results? | Hidden wear or missing parts |
| Rebuilt | Wear items may have been renewed | What work and components are covered? | Quality varies by rebuild standard |
| New | Usually the least uncertain history | What exactly is included and warranted? | Higher initial price |
The best choice depends on the vehicle’s value, the availability of correct parts, the seller’s evidence, and the cost of repeating the job. A used rack with clear provenance can be a better decision than an unclear “rebuilt” unit, while a new part may make more sense when labor is especially expensive.
Calculate the total cost beyond the purchase price
Add shipping, taxes, core charges, tie rods, boots, seals, fluid, replacement hardware, labor, diagnostic time, calibration, and wheel alignment. Also allow for the possibility that a seized fastener or damaged steering-column coupling will extend the job. A rack that appears inexpensive can become poor value if it requires several extra parts.
Write the estimate before ordering. Include a contingency for correcting related wear, but do not use that contingency to excuse vague seller information. If the installed cost approaches that of a better-supported alternative, the additional certainty may justify the difference.
Assess warranty coverage and return conditions
Read whether the warranty covers the complete assembly, internal failure, leaks, electronic faults, labor, or only the part itself. Check the duration, exclusions, claim procedure, and requirement to provide installation evidence. A return period may be shorter than the time needed to diagnose a problem after installation, so clarify how a suspected defect is handled.
Also confirm who pays return shipping and whether the part must be returned in its original condition. Keep invoices, photographs, packaging, and installation records. Those documents can make a legitimate claim much easier to resolve.
Identify warning signs of an unreliable seller
Be cautious when the listing lacks a donor vehicle, part number, mileage, current photos, or a clear description of included components. Pressure to pay immediately, refusal to answer fitment questions, and an unusually broad “fits everything” claim are also reasons to stop. A professional seller should be able to explain uncertainty instead of hiding it.
The wine-pairing guide and Dubai company-structure guide are unrelated subjects, but they illustrate a useful editorial principle for any comparison: details matter more than a broad label. For a steering rack, that means evaluating the actual assembly and terms rather than relying on a generic category such as “Haval part.”
Planning the replacement and installation
Replacing a rack is often a moderate-to-advanced repair because the assembly connects steering, suspension, and sometimes hydraulic or electronic systems. The exact procedure varies by vehicle and rack type, so use the correct service information and follow workshop safety practices. Never treat a steering component as an experiment if the required procedure or torque specifications are unknown.
Before work begins, compare the replacement with the old rack while both are accessible. This is the last convenient opportunity to spot a missing bracket, different connector, incorrect shaft, or absent tie rod.
Prepare the vehicle and confirm the required tools
Park on a level surface, secure the vehicle, disconnect power where the service procedure requires it, and support the vehicle with appropriate stands. Gather the correct sockets, torque wrench, line tools, pullers, fluid-capture equipment, alignment provisions, and any scan or initialization equipment required for an electric system.
Marking the steering-wheel and shaft relationship can help during reassembly, but those marks do not replace the manufacturer’s procedure. Protect open hydraulic lines and electronic connectors from dirt, and keep removed fasteners organized by location.
Remove the old rack without damaging connected components
Disconnect the battery or hydraulic system only as specified, then remove connected parts in the correct sequence. Tie-rod ends, steering-column couplings, hydraulic lines, wiring, subframe components, and mounting bolts may all require careful handling. Do not hammer directly on threaded shafts or allow the steering column to hang unsupported.
Take photographs during disassembly, especially where brackets, spacers, clips, and wiring routes are difficult to remember. If a fastener is corroded or a line is stuck, slow down rather than applying force that could damage a reusable component.
Install the replacement and replace worn supporting parts
Compare the replacement one more time before fitting it. Transfer only parts that are confirmed serviceable, and replace torn boots, loose tie rods, damaged bushes, or corroded fasteners where appropriate. Follow specified torque values and make sure the rack is centered before the steering column and tie rods are connected.
Avoid using the new rack to compensate for worn suspension components. If a mounting bush is loose or a tie rod has play, the vehicle may still feel unstable after the rack is installed. A clean installation addresses the surrounding parts that affect steering response.
Bleed hydraulic systems or initialize electric steering systems
Hydraulic racks require the correct fluid, careful line reconnection, and bleeding according to the service procedure. Turning the wheel repeatedly with a dry pump can create additional damage, while trapped air can cause noise and inconsistent assistance. Check the reservoir, connections, and fluid condition as the system is brought back into service.
Electric systems may need a steering-angle reset, calibration, fault-code clearing, or other initialization. The required steps depend on the vehicle and component. If a warning light remains on or the steering assist is abnormal, stop and diagnose the system rather than continuing to drive.
Complete wheel alignment and post-installation checks
A rack replacement can alter toe settings even when the tie rods are installed carefully. Have the vehicle aligned with the steering wheel centered, and ask for the readings before and after adjustment. Check that the tires are seated correctly and that no suspension or steering joint has been left loose.
Finish with a controlled road test in a safe area. Look for leaks, warning lights, off-center steering, unusual noise, binding, vibration, and a tendency to pull. Recheck fasteners and fluid after the test and follow any additional inspection interval in the service information.
Maintaining a replacement steering rack
Maintenance begins immediately after installation. Early checks can reveal a leaking connection, incorrect fluid level, loose mount, or alignment issue before it causes further damage. Keep notes about the installation date, mileage, part source, and any work performed on related steering components.
A rack does not operate in isolation. Road impacts, worn suspension joints, damaged boots, contaminated fluid, and poor alignment can all shorten the life of a replacement. Regular inspection is therefore more useful than waiting for a dramatic steering failure.
Monitor steering response, noise, and fluid levels
Pay attention to changes in steering effort, return-to-center behavior, looseness, vibration, and any knocking during low-speed turns. For hydraulic systems, check the fluid level and inspect the reservoir and line connections for leaks. A small damp patch should be investigated before it becomes a loss of assistance.
Electric steering may show warning lights or intermittent assistance rather than fluid loss. Record when the symptom occurs, whether the vehicle is hot or cold, and whether it follows rain or a heavy impact. Those details can help separate a rack issue from a wiring, sensor, or charging-system problem.
Inspect boots, tie rods, and mounting hardware regularly
The rack boots protect inner joints and the rack shaft from water and grit. Look for splits, loose clamps, distortion, or grease escaping from the ends. Check tie-rod play and inspect mounting hardware for movement, damaged bushes, or signs that a bolt has loosened.
These checks are especially useful after driving through deep water, on rough roads, or after contact with a curb. Replacing a damaged boot early may prevent contamination from reaching an otherwise usable joint or rack surface.
Use the correct power steering fluid where applicable
Use only the fluid specified for the vehicle and system. Mixing incompatible fluids or using a general-purpose substitute can affect seals, hoses, pump operation, and steering feel. Keep the fluid container clean and avoid introducing dirt while topping up.
If fluid repeatedly drops, do not simply refill it and continue driving. Find the source, inspect the rack boots and lines, and correct the leak. Persistent contamination or foaming also deserves diagnosis rather than repeated fluid changes.
Address alignment and suspension problems early
Incorrect toe, bent suspension parts, worn ball joints, and damaged wheel bearings can create steering symptoms or place extra loads on the rack. Uneven tire wear is often a useful clue. Have the vehicle inspected when the steering wheel is no longer centered or the vehicle begins pulling to one side.
Alignment should follow, not replace, a mechanical inspection. Adjusting toe cannot correct a bent rack mount or loose tie rod. Resolving the underlying problem early is usually less disruptive than waiting until several components are affected.
Know when professional diagnosis is necessary
Seek professional help when the steering becomes heavy, locks or binds, develops substantial play, leaks heavily, or triggers a warning light. A shop is also the right setting when special tools, electronic initialization, hydraulic bleeding, or subframe removal are required. Steering work should be verified by someone who can inspect the complete system.
If the vehicle behaves differently after installation, stop driving it except when necessary to move it safely for inspection. A second diagnosis may identify an incorrect part, installation error, calibration issue, or unrelated suspension fault before it becomes a larger safety problem.
Conclusion
Used Haval steering racks can offer a practical route to repair when the exact fitment, condition, included parts, seller terms, and installation requirements are all clear. Compare the complete cost, inspect the evidence, and treat alignment and post-installation testing as essential parts of the job. A patient purchase is far more likely to produce a safe, predictable result than a rushed bargain.
Frequently Asked Questions
Are used steering racks worth buying?
They can be worthwhile when the rack matches the vehicle precisely, has credible mileage and removal information, and is backed by clear testing and return terms. The total installed cost should be compared with rebuilt and new alternatives.
How can I confirm a steering rack will fit?
Compare the vehicle identification details, production year, steering side, part number, mounting points, input shaft, tie-rod threads, hydraulic ports, and electrical connectors. Written confirmation from the seller is preferable to relying on a photograph alone.
Should tie rods be replaced with a used rack?
Not always, but tie rods should be inspected closely. If the threads are damaged, the shaft is bent, the boot is torn, or play is present, replacing the worn supporting part while the rack is accessible may prevent repeat labor.
What does a rack warranty usually cover?
Coverage varies. Some warranties apply only to the part and internal failure, while others may address leaks or electronic faults under specific conditions. Check duration, exclusions, labor coverage, return shipping, and installation requirements before purchase.
Does replacing a steering rack require wheel alignment?
Usually, yes. Removing and refitting the rack or changing tie-rod length can alter toe settings. A proper alignment also checks whether the steering wheel is centered and whether related suspension issues need attention.
What fluids should be used after installation?
Use the fluid specified for the vehicle’s hydraulic steering system, if it has one. Do not mix fluids unless the service information explicitly permits it, and investigate any continuing fluid loss instead of repeatedly topping up the reservoir.
When should a steering problem be diagnosed professionally?
Professional diagnosis is appropriate for heavy or binding steering, major play, persistent noise, leaks, warning lights, intermittent assistance, or abnormal behavior after installation. These symptoms can involve several connected components and should not be guessed at.